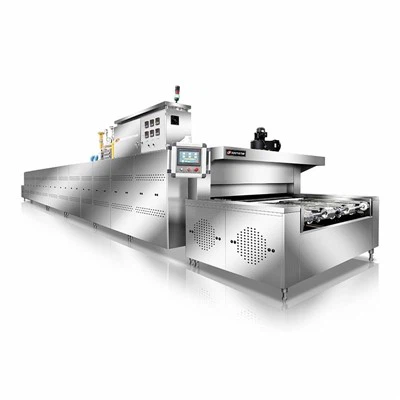
As a seasoned supplier of tunnel ovens, I've encountered numerous clients facing the challenge of conveyor belt replacement. This process is crucial for maintaining the efficiency and longevity of your tunnel oven. In this blog, I'll guide you through the step-by-step process of replacing the conveyor belt in a tunnel oven, ensuring that you can handle this task with confidence.
Understanding the Importance of Conveyor Belt Replacement
The conveyor belt is the heart of a tunnel oven, responsible for transporting products through the heating chamber. Over time, continuous use can lead to wear and tear, which may result in reduced performance, uneven heating, and even product damage. Regularly replacing the conveyor belt is essential to ensure consistent quality and productivity in your baking or manufacturing process.
Preparing for Conveyor Belt Replacement
Before you begin the replacement process, it's important to gather all the necessary tools and materials. Here's a list of items you'll need:
- New Conveyor Belt: Ensure that the new belt is the correct size and type for your tunnel oven. You can refer to your oven's manual or consult with our technical support team for guidance.
- Tools: You'll need a variety of tools, including wrenches, screwdrivers, pliers, and a belt cutter. Make sure you have all the necessary tools on hand before you start.
- Safety Equipment: Safety should always be your top priority. Wear protective gloves, safety glasses, and appropriate clothing to prevent injuries during the replacement process.
- Cleaning Supplies: Before installing the new belt, it's important to clean the oven thoroughly to remove any debris or residue. You'll need a cleaning solution, a brush, and a cloth for this task.
Step-by-Step Guide to Conveyor Belt Replacement
Step 1: Turn Off the Oven and Disconnect the Power
Before you start working on the oven, make sure it's completely cooled down and disconnected from the power source. This will prevent any electrical accidents and ensure your safety.
Step 2: Remove the Old Conveyor Belt
Once the oven is cooled down, open the oven door and locate the conveyor belt. Use a wrench or screwdriver to remove the bolts or screws that hold the belt in place. Carefully lift the old belt out of the oven and set it aside.
Step 3: Clean the Oven
With the old belt removed, it's time to clean the oven. Use a cleaning solution and a brush to remove any debris or residue from the oven chamber. Pay special attention to the areas where the belt was installed, as these areas may have accumulated a lot of dirt and grime.
Step 4: Install the New Conveyor Belt
Once the oven is clean, it's time to install the new conveyor belt. Carefully place the new belt in the oven, making sure it's properly aligned with the rollers. Use a wrench or screwdriver to secure the belt in place with the bolts or screws.
Step 5: Adjust the Tension of the Conveyor Belt
After the new belt is installed, it's important to adjust the tension to ensure proper operation. Use a tension gauge to measure the tension of the belt and adjust it as needed. The tension should be tight enough to prevent slippage but not so tight that it causes excessive wear on the belt or the rollers.
Step 6: Test the Conveyor Belt
Once the tension is adjusted, it's time to test the conveyor belt. Turn on the oven and let it run for a few minutes to make sure the belt is running smoothly. Check for any signs of slippage, misalignment, or other issues. If you notice any problems, stop the oven immediately and make the necessary adjustments.
Step 7: Reconnect the Power and Start the Oven
After testing the conveyor belt, it's time to reconnect the power and start the oven. Let the oven preheat to the desired temperature and then start using it as normal. Monitor the oven closely for the first few hours to ensure that everything is working properly.
Tips for Maintaining Your Conveyor Belt
- Regular Cleaning: Regularly clean the conveyor belt to remove any debris or residue that may accumulate over time. This will prevent the belt from slipping and ensure its longevity.
- Proper Tension: Make sure the conveyor belt is properly tensioned at all times. Over-tightening the belt can cause excessive wear, while under-tightening it can lead to slippage.
- Lubrication: Lubricate the rollers and other moving parts of the conveyor belt regularly to reduce friction and prevent wear. Use a lubricant that's specifically designed for conveyor belts.
- Inspection: Regularly inspect the conveyor belt for signs of wear and tear, such as cracks, fraying, or stretching. Replace the belt immediately if you notice any of these issues.
Conclusion
Replacing the conveyor belt in a tunnel oven is a relatively simple process that can be done by anyone with basic mechanical skills. By following the steps outlined in this blog, you can ensure that your oven continues to operate efficiently and produce high-quality products. If you have any questions or need further assistance, don't hesitate to contact our technical support team. We're here to help you every step of the way.
If you're in the market for a new tunnel oven, we offer a wide range of Gas Tunnel Oven, Tunnel Oven for Bread, and Electric Tunnel Oven options to meet your specific needs. Our ovens are designed to provide consistent heat distribution, energy efficiency, and reliable performance. Contact us today to learn more about our products and how we can help you improve your baking or manufacturing process.


References
- "Tunnel Oven Maintenance Guide," Industry Best Practices, 2023.
- "Conveyor Belt Installation and Replacement Manual," Manufacturer's Handbook, 2023.